Building a Business Website from Scratch with Django
Table of Contents
This guide is not written as a theoretical Django tutorial. The goal is to prove each step by building a real project first, testing it, and only then documenting the result.
The use case is a local cleaning company called Mudos Clean. The site needs to list services, show service detail pages, collect quote requests, and let the business owner manage services and leads through the Django admin.
Instead of starting with the final article, we start with the working system.
1. Verify the Environment
The project started in an empty folder. Before creating any Django files, the environment was checked:
python --version
python -m django --version
The verified environment:
Python 3.11.9
Django 5.0.2
This matters because every later step depends on a real Django installation, not just example code pasted into a document.
2. Create the Django Project
The project was created with:
python -m django startproject config .Using python -m django avoids relying on whether django-admin is available in the Windows PATH. The command created the project-level config package and the manage.py entrypoint.
At this stage, the project has the standard Django structure:
config/
manage.py
3. Create the Services App
The business domain lives in a dedicated app:
python manage.py startapp servicesThen the app was registered in config/settings.py:
INSTALLED_APPS = [
    "django.contrib.admin",
    "django.contrib.auth",
    "django.contrib.contenttypes",
    "django.contrib.sessions",
    "django.contrib.messages",
    "django.contrib.staticfiles",
    "services",
]
This gives the project a clean boundary: service listings, quote requests, forms, public views, templates, and tests all live in the services app.
4. Model the Business
The first version of the business model has two core entities:
Service: a cleaning service the company offersQuoteRequest: a lead submitted by a visitor
The models were added to services/models.py:
from django.db import models


class Service(models.Model):
    title = models.CharField(max_length=120)
    slug = models.SlugField(unique=True)
    short_description = models.CharField(max_length=240)
    description = models.TextField()
    starting_price = models.DecimalField(max_digits=10, decimal_places=2)
    is_featured = models.BooleanField(default=False)
    created_at = models.DateTimeField(auto_now_add=True)

    class Meta:
        ordering = ["title"]

    def __str__(self):
        return self.title


class QuoteRequest(models.Model):
    TIMING_CHOICES = [
        ("once", "One-time"),
        ("weekly", "Weekly"),
        ("monthly", "Monthly"),
    ]

    service = models.ForeignKey(
        Service,
        on_delete=models.PROTECT,
        related_name="quote_requests",
    )
    full_name = models.CharField(max_length=120)
    phone = models.CharField(max_length=40)
    email = models.EmailField(blank=True)
    address = models.CharField(max_length=255)
    timing = models.CharField(max_length=20, choices=TIMING_CHOICES)
    note = models.TextField(blank=True)
    created_at = models.DateTimeField(auto_now_add=True)
    is_contacted = models.BooleanField(default=False)

    class Meta:
        ordering = ["-created_at"]

    def __str__(self):
        return f"{self.full_name} - {self.service.title}"
The model choices are intentionally business-oriented:
sluggives each service a stable URL.is_featuredlets the homepage highlight key services.QuoteRequest.serviceusesPROTECTso existing leads are not broken by deleting a service.is_contactedgives the owner a simple lead follow-up workflow.
5. Add Admin Management
The Django admin was configured before building a polished frontend because service businesses need editable content early.
services/admin.py registers both models:
from django.contrib import admin

from .models import QuoteRequest, Service


@admin.register(Service)
class ServiceAdmin(admin.ModelAdmin):
    list_display = ("title", "starting_price", "is_featured", "created_at")
    list_filter = ("is_featured",)
    search_fields = ("title", "short_description")
    prepopulated_fields = {"slug": ("title",)}


@admin.register(QuoteRequest)
class QuoteRequestAdmin(admin.ModelAdmin):
    list_display = (
        "full_name",
        "service",
        "phone",
        "timing",
        "is_contacted",
        "created_at",
    )
    list_filter = ("service", "timing", "is_contacted")
    search_fields = ("full_name", "phone", "email", "address")
Now the owner can manage services and incoming leads without code changes.
6. Build the Public Workflow
The first public workflow has three pages:
- Service list
- Service detail with quote form
- Quote request success page
The app URL configuration is:
from django.urls import path

from . import views

app_name = "services"

urlpatterns = [
    path("", views.service_list, name="service_list"),
    path("services/<slug:slug>/", views.service_detail, name="service_detail"),
    path("quote-request-received/", views.quote_success, name="quote_success"),
]
The root project URLs include the app:
from django.contrib import admin
from django.urls import include, path

urlpatterns = [
    path("admin/", admin.site.urls),
    path("", include("services.urls")),
]
This gives us real routes that tests and browsers can hit.
7. Add the Quote Request Form
The form is backed by the QuoteRequest model:
from django import forms

from .models import QuoteRequest


class QuoteRequestForm(forms.ModelForm):
    class Meta:
        model = QuoteRequest
        fields = ["full_name", "phone", "email", "address", "timing", "note"]
The detail view handles both page rendering and form submission. On valid POST, it attaches the selected service and saves the lead:
def service_detail(request, slug):
    service = get_object_or_404(Service, slug=slug)

    if request.method == "POST":
        form = QuoteRequestForm(request.POST)
        if form.is_valid():
            quote_request = form.save(commit=False)
            quote_request.service = service
            quote_request.save()
            return redirect("services:quote_success")
    else:
        form = QuoteRequestForm()

    return render(
        request,
        "services/service_detail.html",
        {
            "service": service,
            "form": form,
        },
    )
This is the first complete business loop: a visitor views a service, submits a form, and a lead is stored in the database.
8. Create the Database Migration
After the models were written, migrations were generated:
python manage.py makemigrations servicesThe result:
Migrations for 'services':
  services\migrations\0001_initial.py
    - Create model Service
    - Create model QuoteRequest
This is an important proof point: the Django model layer produced a concrete database migration.
9. Run the System Check
Before running tests, Django's built-in project check was executed:
python manage.py checkThe result:
System check identified no issues (0 silenced).This confirms that settings, app registration, URL configuration, and model definitions are structurally valid.
10. Fix the First Browser Reality Check
The first browser check was useful because it exposed two practical issues that a pure code walkthrough would have hidden.
First, opening the site before applying migrations returned a server error. The fix was to apply the database migrations:
python manage.py migrate --noinputAfter that, the homepage returned 200 OK.
Second, the page technically worked but looked empty because the database had no services yet. That is expected for a brand-new Django app, but it is not a good demo state for a tutorial. To make the project repeatable, a small seed command was added:
python manage.py seed_servicesThe command loads three demo services:
- Home Cleaning
- Office Cleaning
- Move-Out Cleaning
The command output was:
Seeded demo services. Created: 3. Updated: 0.This became another testable behavior, so the test suite was expanded to verify that the seed command creates three services and marks two as featured.
11. Add Core Website Components
The first version worked, but it was still only a set of raw pages. A service business website needs a few persistent layout components:
- A header with the brand and primary navigation
- A clear call-to-action
- A footer with business context
- Responsive spacing and grid behavior for mobile devices
To avoid duplicating HTML and CSS across pages, a shared template was added:
services/templates/services/base.htmlThe page templates now extend that base:
{% extends "services/base.html" %}This makes the site structure more realistic. The homepage, service detail page, and quote success page now share the same header, navigation, footer, typography, spacing, and responsive rules.
The tests were also updated to check for shared layout output. The service list page test now verifies that the navigation and footer content render:
self.assertContains(response, "Primary navigation")
self.assertContains(response, "A Django-powered service business website")
12. Test a Visual Enhancement Scenario
Once the basic site structure existed, the next question was how we would visualize the service offering. Two common website enhancements were tested:
- Add icons to service cards.
- Add a hamburger menu for mobile navigation.
The service model gained a small icon field:
ICON_CHOICES = [
    ("home", "Home"),
    ("briefcase", "Office"),
    ("sparkles", "Deep cleaning"),
]

icon = models.CharField(max_length=32, choices=ICON_CHOICES, default="sparkles")
Then a second migration was created:
services\migrations\0002_service_icon.py
  - Add field icon to service
The seed command was updated so each demo service gets a meaningful icon:
Home Cleaninguseshome.Office Cleaningusesbriefcase.Move-Out Cleaningusessparkles.
The homepage template renders those icons through a small partial:
services/templates/services/partials/service_icon.htmlFor mobile navigation, the shared header now includes a checkbox-powered hamburger toggle. This keeps the implementation lightweight and easy to test without adding a frontend framework.
The test suite was expanded again:
self.assertContains(response, "service-icon")
self.assertContains(response, "Toggle navigation menu")
There is also a deterministic visual-verification route for the open mobile menu:
/?menu=openThat query parameter renders the menu toggle as checked, making the open hamburger state easy to screenshot in a repeatable way.
13. Capture Visual Proof
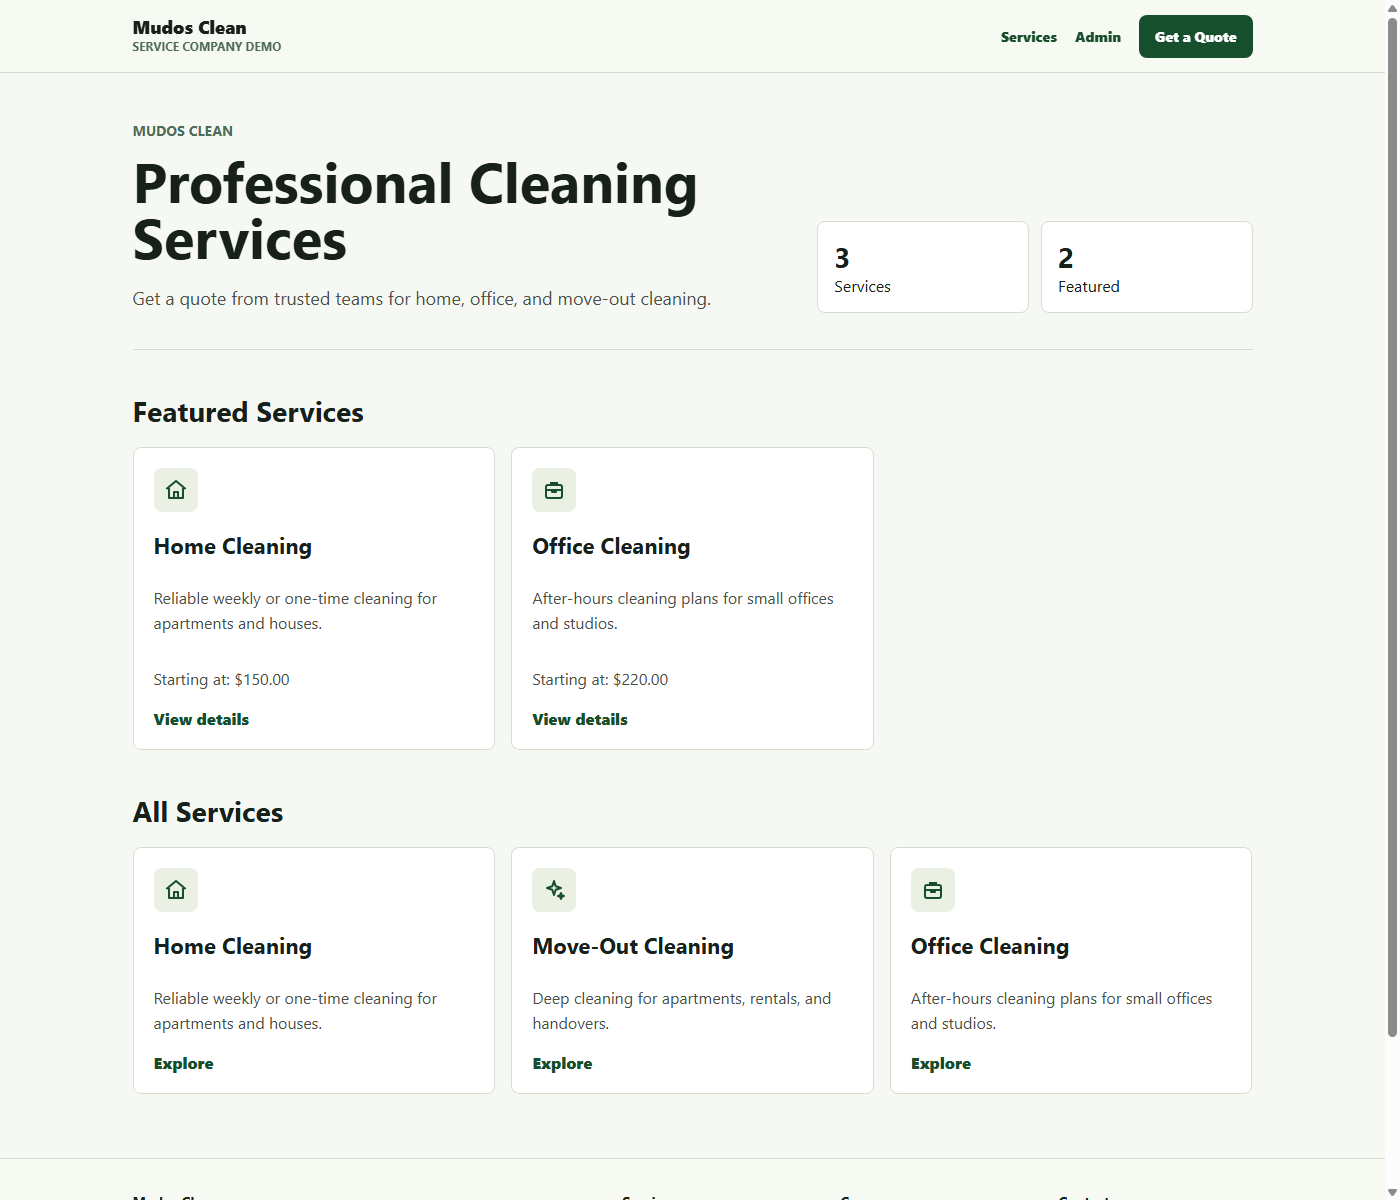
After seeding data, adding header and footer components, and improving the responsive templates, screenshots were captured from the local site.
Desktop homepage:
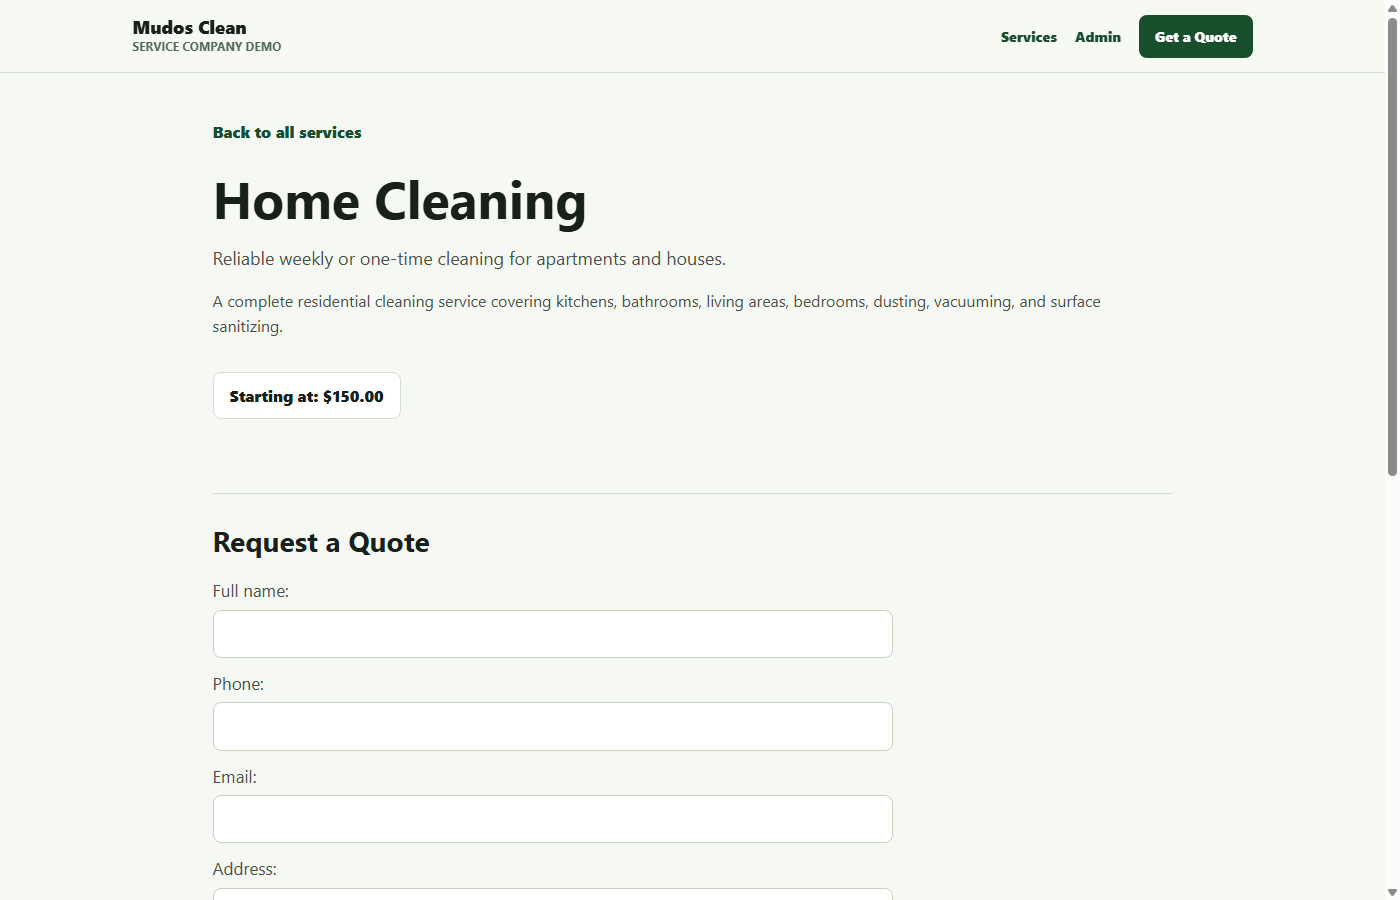
Desktop service detail page:
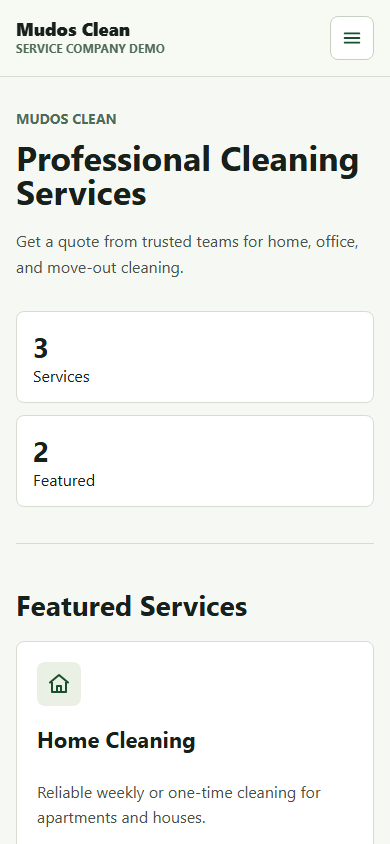
Mobile homepage:
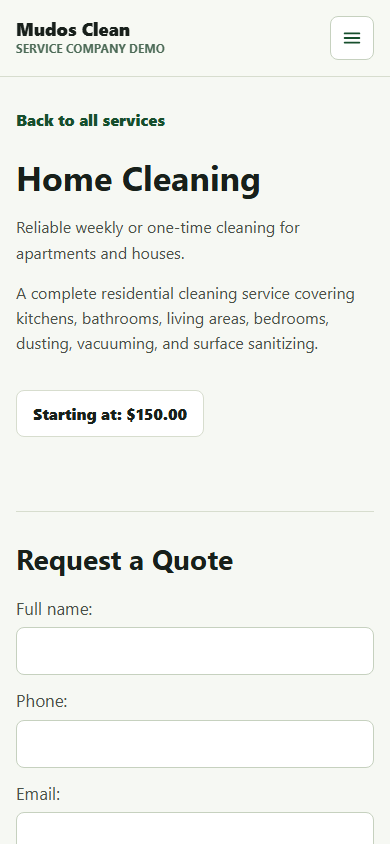
Mobile service detail page:
Mobile homepage with the hamburger menu open:
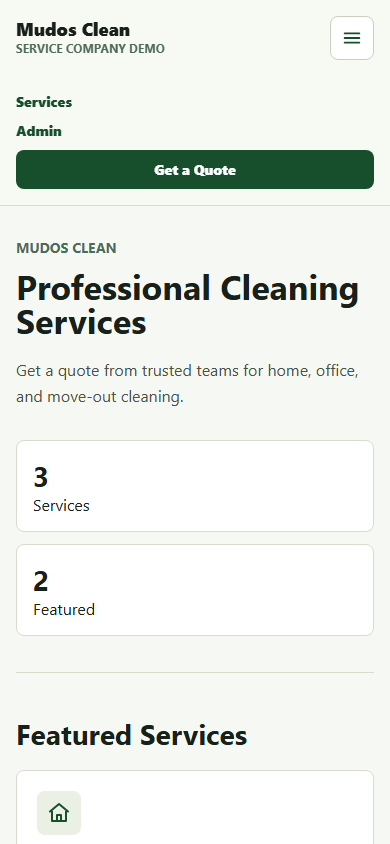
This is an important part of the process. The tests prove behavior, but screenshots prove the tutorial is not leading to a blank or confusing first screen.
During mobile screenshot review, the layout exposed a real responsive issue: the header call-to-action and some long text lines were being clipped in the narrow viewport. The CSS was adjusted so that small screens use a left-aligned safe width, stacked navigation, single-column cards, and wrapped headings. The final mobile screenshots confirm that the content is readable at 390x844.
14. Prove the Behavior with Tests
The first test suite covers the behaviors that matter for the service business workflow:
- A service has the expected string representation.
- The service list page renders a service.
- The service detail page shows the quote form.
- A quote request can be submitted and saved.
- The seed command creates demo services for the local walkthrough.
- The shared header and footer render.
- Service icons render on the homepage.
- The mobile menu can render in an open state for visual verification.
The tests live in services/tests.py:
from django.test import TestCase
from django.urls import reverse

from .models import QuoteRequest, Service


class ServiceModelTests(TestCase):
    def test_service_string_representation_is_title(self):
        service = Service.objects.create(
            title="Home Cleaning",
            slug="home-cleaning",
            short_description="Detailed home cleaning service.",
            description="Professional cleaning for kitchens and living areas.",
            starting_price=150,
        )

        self.assertEqual(str(service), "Home Cleaning")


class ServicePageTests(TestCase):
    def setUp(self):
        self.service = Service.objects.create(
            title="Home Cleaning",
            slug="home-cleaning",
            short_description="Detailed home cleaning service.",
            description="Professional cleaning for kitchens, bathrooms, and living areas.",
            starting_price=150,
            is_featured=True,
        )

    def test_service_list_page_shows_service(self):
        response = self.client.get(reverse("services:service_list"))

        self.assertEqual(response.status_code, 200)
        self.assertContains(response, "Home Cleaning")
        self.assertContains(response, "Featured Services")

    def test_service_detail_page_shows_quote_form(self):
        response = self.client.get(
            reverse("services:service_detail", args=[self.service.slug])
        )

        self.assertEqual(response.status_code, 200)
        self.assertContains(response, "Request a Quote")
        self.assertContains(response, "Send Quote Request")

    def test_quote_request_can_be_created(self):
        response = self.client.post(
            reverse("services:service_detail", args=[self.service.slug]),
            {
                "full_name": "Jane Miller",
                "phone": "555-000-0000",
                "email": "[email protected]",
                "address": "Downtown",
                "timing": "once",
                "note": "I would like a quote for this weekend.",
            },
        )

        self.assertRedirects(response, reverse("services:quote_success"))
        self.assertEqual(QuoteRequest.objects.count(), 1)
The test suite was run with:
python manage.py testThe result:
Found 11 test(s).
System check identified no issues (0 silenced).
...........
----------------------------------------------------------------------
Ran 11 tests in 0.151s

OK
This is the core proof of the project so far. The site is not just described; its first business workflow is tested.
15. Automate Maintenance Releases
After the first working version, the next realistic question is maintenance. A business website is not finished once it launches. It needs small recurring updates: copy changes, service changes, design improvements, dependency updates, bug fixes, and eventually translated versions.
To make that workflow repeatable, the project now has a simple versioning system:
VERSION
CHANGELOG.md
The VERSION file stores the current site version:
0.4.0The footer reads that file through a context processor and displays the version on every page:
Version
v0.4.0
The version reader is intentionally small:
def current_version():
    path = version_file_path()

    if not path.exists():
        return "0.0.0"

    return path.read_text(encoding="utf-8").strip() or "0.0.0"
For recurring maintenance, a management command prepares a release:
python manage.py prepare_release 0.4.0 \
  --note "Added remote tag-based release workflow." \
  --note "Added release manifest artifact for deployment automation." \
  --note "Added remote release runbook with deploy and rollback steps."
The command updates VERSION and prepends a new section to CHANGELOG.md:
## 0.4.0

- Added remote tag-based release workflow.
- Added release manifest artifact for deployment automation.
- Added remote release runbook with deploy and rollback steps.
This gives the project a lightweight release process:
- Make a small update.
- Add or update tests.
- Run
python manage.py test. - Prepare a release with
python manage.py prepare_release. - Review
CHANGELOG.md. - Deploy.
The release command is also tested. The test creates a temporary project directory, runs the command, and verifies that both VERSION and CHANGELOG.md were updated. That matters because maintenance automation should be trustworthy before it becomes part of the workflow.
This same structure will help when we create future language versions. Each translated article or localized site iteration can be tied to a version, documented in the changelog, tested, and deployed as a controlled update instead of an informal edit.
16. Automate Remote Releases
Local release preparation is useful, but it does not answer the full production question: what happens when a new version is pushed remotely?
For that, the project now includes a tag-based release workflow:
.github/workflows/release.ymlThe remote release trigger is a semantic version tag:
git tag v0.4.0
git push origin v0.4.0
The workflow is designed to run this sequence:
Git tag -> CI tests -> release manifest -> deploy hook -> health checkThe workflow runs the same project checks we run locally:
python manage.py check
python manage.py test
Then it builds a release manifest:
python manage.py build_release_manifest --environment production --deploy-target managed-paasThe generated release-manifest.json records the production release context:
{
  "version": "0.4.0",
  "tag": "v0.4.0",
  "environment": "production",
  "deploy_target": "managed-paas",
  "required_checks": [
    "python manage.py test",
    "python manage.py check"
  ],
  "remote_release_steps": [
    "push git tag",
    "run CI checks",
    "deploy on successful checks",
    "run post-deploy health check"
  ],
  "rollback": {
    "strategy": "redeploy previous successful tag"
  }
}
That manifest becomes a small release artifact. It is useful because it gives each remote release a traceable version, tag, environment, deployment target, required checks, and rollback strategy.
For deployment, the workflow uses two secrets:
DEPLOY_HOOK_URL
PRODUCTION_HEALTHCHECK_URLDEPLOYHOOKURL points to the hosting provider's deploy hook. On a managed platform, that hook can trigger the production deployment after tests pass.
PRODUCTIONHEALTHCHECKURL points to a public URL that should return success after deployment. This gives the workflow a simple post-deploy verification step.
The project also has a runbook:
docs/remote-release-runbook.mdThe remote release process becomes:
- Prepare the release locally with
prepare_release. - Run tests locally.
- Commit
VERSION,CHANGELOG.md, and code changes. - Create a Git tag such as
v0.4.0. - Push the tag.
- Let CI run tests.
- Let the deploy hook publish the new version.
- Run the health check.
- Roll back by redeploying the previous successful tag if needed.
This flow also supports future translated versions. For example, if the Turkish version becomes v0.5.0, it can go through the same release path: update content, test, prepare release notes, tag, push, deploy, and verify.
The remote release logic is tested in three ways:
- The release manifest function returns the expected version, tag, required checks, release steps, changelog, and rollback strategy.
- The
buildreleasemanifestcommand writes a JSON artifact. - The workflow file contains the expected test, manifest, deploy hook, and health check steps.
17. Where This Should Be Deployed
This project is still a local tutorial app, so deployment should happen only after the production checklist is handled. The important production changes are:
- Move secrets such as
SECRET_KEYinto environment variables. - Set
DEBUG = False. - Configure
ALLOWED_HOSTS. - Use PostgreSQL instead of the local SQLite database.
- Run migrations on the production database.
- Collect static files with
python manage.py collectstatic. - Serve Django with a production WSGI server such as Gunicorn.
- Put a reverse proxy such as Nginx in front of the app if using a VPS.
- Add HTTPS through the hosting provider or a certificate tool.
For this project, there are two sensible deployment paths.
Simplest path: managed PaaS
Use a platform that can run a Python web service and attach a PostgreSQL database. This is the best first choice for a tutorial project because it removes most server maintenance. A typical setup would be:
Git repository -> Python web service -> PostgreSQL -> environment variables -> custom domainGood fits for this kind of Django app are platforms like Render, Fly.io, Railway, or a similar managed Python hosting provider. The exact provider is less important than the requirements: Python runtime, persistent PostgreSQL, environment variables, HTTPS, deploy logs, and a predictable build command.
More controlled path: VPS
Use an Ubuntu VPS if the goal is to teach real server operations. A common stack is:
Ubuntu VPS
Nginx
Gunicorn
Django
PostgreSQL
systemd
HTTPS
This gives more control, but also requires maintaining the server, firewall, updates, process manager, logs, database backups, and SSL renewal.
For this blog series, the better next step is a managed PaaS deployment first. It keeps the focus on Django and lets the article prove a complete path from local development to a public URL. A later article can repeat the same deployment on a VPS to teach server administration.
18. What Comes Next
The next iteration should continue in the same order:
- Add the next behavior.
- Write or update tests.
- Run the tests.
- Only then update the blog article.
Good next candidates are:
- Add production-ready styling and static files.
- Add service areas such as neighborhoods or cities.
- Add email notifications when a quote request arrives.
- Add SEO fields to services.
- Add seed data for demo services.
- Add deployment notes after the app is actually deployable.
Conclusion
The key lesson is process. A Django tutorial becomes much stronger when it is built from working proof instead of polished prose. In this first iteration, we created the project, added a service business domain, wired public pages, saved quote requests, generated migrations, fixed the first empty browser state with seed data, added shared header and footer components, tested service icons and hamburger navigation, automated local maintenance releases, added remote release automation, captured desktop and mobile screenshots, ran Django's system check, and passed eleven tests.
That gives us a solid foundation for the final blog series: each section can be backed by code that actually exists and tests that actually pass.
References
- Django Documentation
- Django Testing Tools
- Django Deployment Checklist
- Django How to Deploy with WSGI
Evidence
- Environment verified with Python 3.11.9 and Django 5.0.2
- Project created with python -m django startproject config .
- App created with python manage.py startapp services
- First browser check returned a 500 until database migrations were applied
- First successful page render was empty until demo services were seeded
- System check passed with no issues
- Demo services seeded with python manage.py seed_services
- Test suite passed: 11 tests ran successfully
- Shared base template added for header, navigation, footer, and responsive layout
- Service icon field added and verified through seed data
- Mobile hamburger navigation added and tested with an open-menu screenshot
- Maintenance automation added with VERSION, CHANGELOG.md, and prepare_release command
- Site footer now displays the current version from VERSION
- Remote release automation added with tag-based GitHub Actions workflow
- Release manifest artifact generated for deploy and rollback traceability
- Desktop screenshots captured for the homepage and service detail page
- Mobile screenshots captured at 390×844 for the homepage and service detail page